Color Coding the Inspector
CollectiveAccess supports the customization of both the look and feel of any cataloging interface. Assigning custom colors and icons to the Inspector window of any record type or record subtype can streamline workflow, as well as ensure clear differentiation and generate easy-to-identify parts of any Editor screen.
Unique colors can be assigned for the main Editors for record types which will extend to all subtypes in the system. Colors can also be assigned to the individual subtypes. If no custom color is assigned, the default color will automatically be assigned.
These changes can be made directly in the user interface of any CollectiveAccess system.
Inspector Window Features
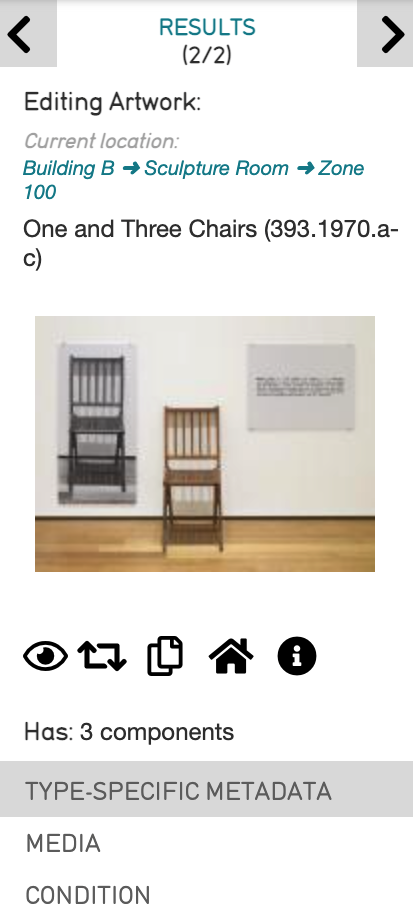
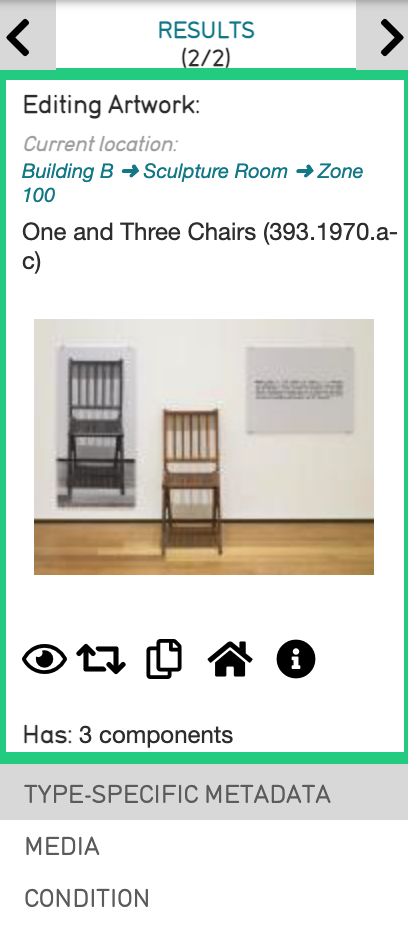
The Inspector window of a record contains all the key "at a glance" information about that record. This includes its primary table, current location, title, accession number, media representation (if any), as well as the various screens containing metadata for that record.
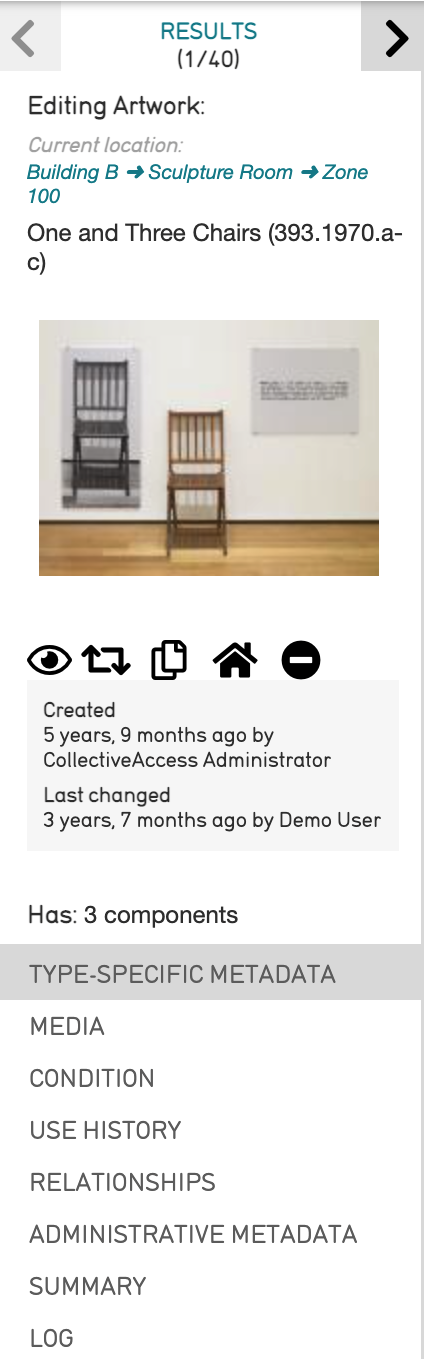
The Window itself also contains five icons from which various features are enabled:
 Watch/Unwatch this Record. Selects
Watched Items which appear in Manage/My Watched Items. To use a
shortcut to view specific records, select the Eye icon, which then
turns red.
Watch/Unwatch this Record. Selects
Watched Items which appear in Manage/My Watched Items. To use a
shortcut to view specific records, select the Eye icon, which then
turns red. Change Record Type. Changes the
record type, and discards any unnecessary metadata elements for the
new type. This cannot be undone.
Change Record Type. Changes the
record type, and discards any unnecessary metadata elements for the
new type. This cannot be undone. Duplicate this Record. Duplicates the
record, with controls that specify what exactly to duplicate.
Duplicate this Record. Duplicates the
record, with controls that specify what exactly to duplicate. Set Home Location. Specifies a
home location for the record, where the record is usually kept.
Set Home Location. Specifies a
home location for the record, where the record is usually kept. See More Information About this
Record. Collapses or expands the information relating to the
record's edit history, visible in the Inspector panel.
See More Information About this
Record. Collapses or expands the information relating to the
record's edit history, visible in the Inspector panel.
Customizing the Editor Inspector
Editor screen colors can be customized through the user interface. To customize the Inspector window in an editor screen:
- Navigate to Manage > Administration in the Global Navigation bar. This opens the list of available editor screens:
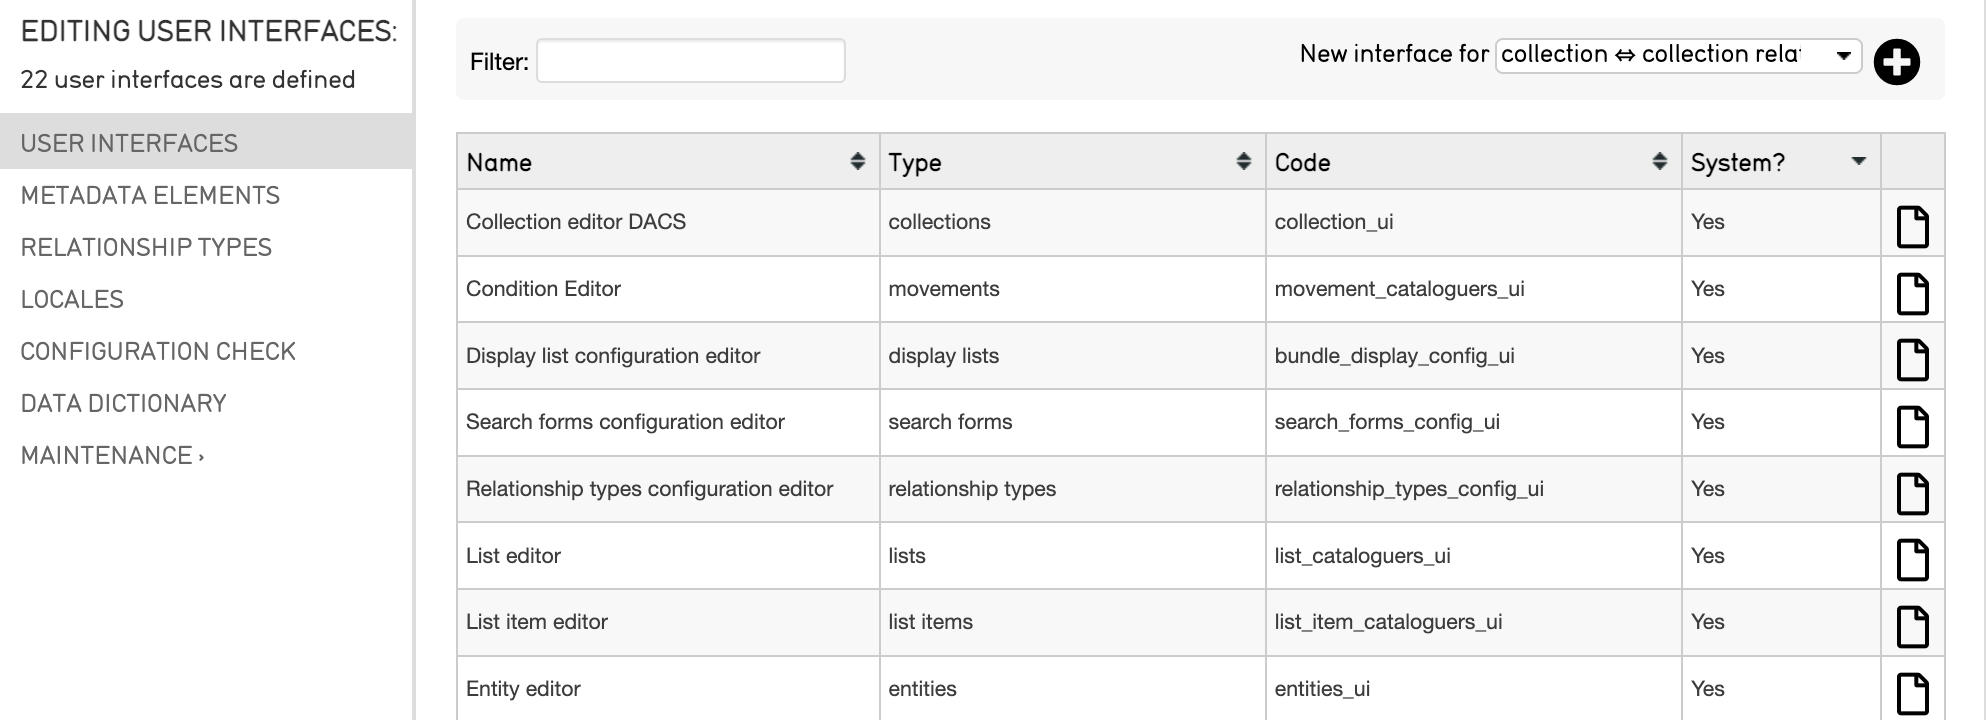
- Open the Editor you wish to customize by selecting the page icon
on the far right of each available editor
screen.
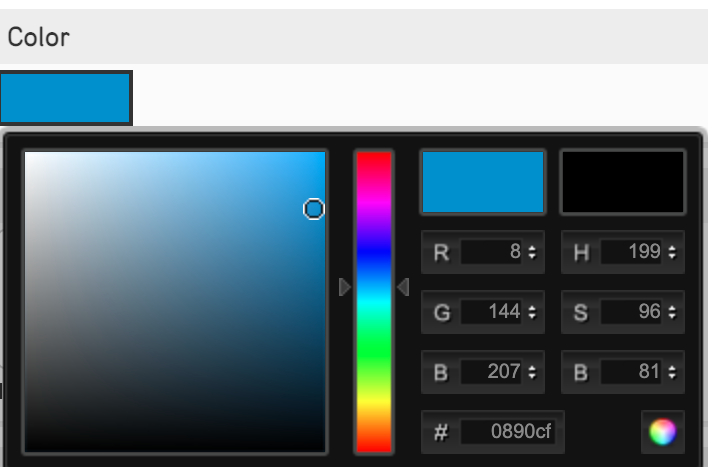
- This will open the editor page. Scroll down and select the Color field. Select the Color box to open the color-picker tool, and use the arrows to choose the color.
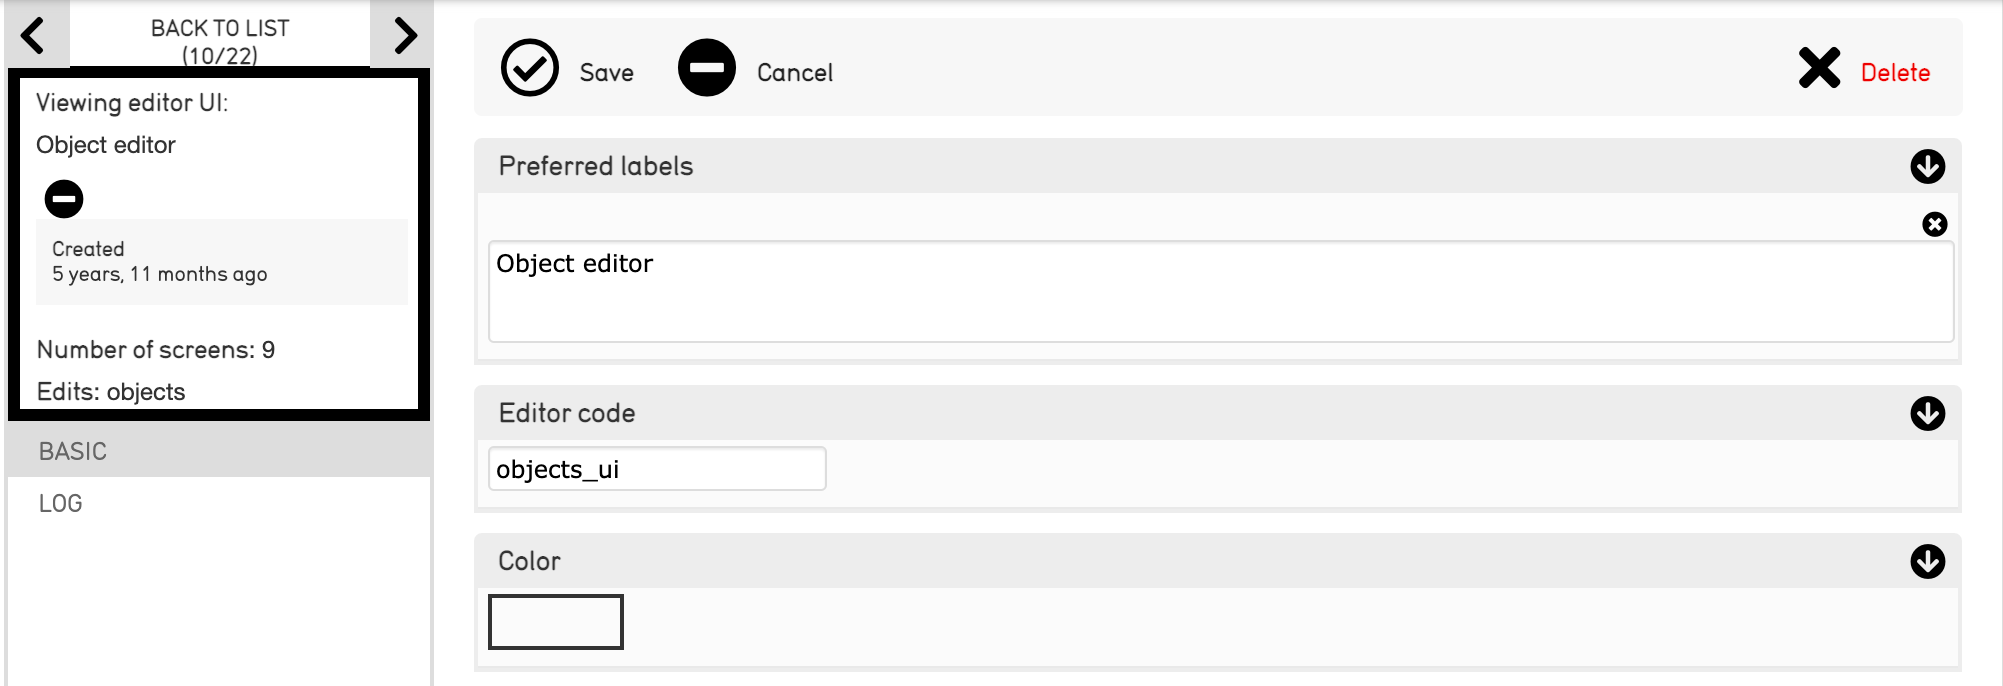
- Select any part of the screen to close the color picker tool.
- Select Save to save the changes made to the Editor.
- Navigate to the record's inspector that was updated to view the new color.
Customizing Screens within the Editor
Individual Screens within a record's Editor can also be customized. To do so:
- Navigate to Manage > Administration in the Global Navigation bar. This opens the list of available editor screens.
- Open the Editor by selecting the same page icon
. The list of available screens which can
be edited is displayed.
- Scroll down to the Screens field. Select the screen to be edited
by selecting the same page icon on the
far right.
- Scroll to the Color field. Select the Color box to open the color-picker tool, and use the arrows to choose the color.
- Select any part of the screen to close the color-picker tool.
- Save the changes made to the Inspector.
- Navigate to the Editor screen in the record that was updated to view the new color.
Customizing the Inspector for Record Subtypes
Customizing the Inspector for record subtypes allows for further differentiation between these subtypes. Although Subtypes are configurable and are therefore different for every CollectiveAccess installation, a general, hypothetical example is the Object subtype Paintings.
To customize the Inspector for the subtype Paintings:
- Navigate to Manage > Lists & Vocabularies in the Global Navigation bar. This opens the List Hierarchy viewer.
- Find the subtype list to use, and select the gray arrow > to open the List Item editor (for the example, Object Types > Paintings in the List Hierarchy viewer).
- Scroll down to the Color field. Select the color-picker tool, and choose a color.
- Scroll down to the Icon field.
- Save the changes made to the Inspector. After saving the Editor, the icon will appear next to this field.